Spring Boot와 Google Cloud SQL연결 및 GCP(Google Cloud Platform) 서버 배포#1
https://coding-is-fun.tistory.com/9
Spring Boot와 Google Cloud SQL연결 및 GCP(Google Cloud Platform) 서버 배포#1
GCP 준비 GCP 회원가입을 진행합니다. https://cloud.google.com/ 클라우드 컴퓨팅 서비스 | Google Cloud 데이터 관리, 하이브리드 및 멀티 클라우드, AI와 머신러닝 등 Google의 클라우드 컴퓨팅 서비스로 비.
coding-is-fun.tistory.com
SSH 연결 이후 이어서 진행하도록 하겠습니다.
SQL 설정
아래 설정대로 root 접속 후 mysql 설치 & 접속을 해줍니다.
$ sudo passwd #root 계정의 패스워드를 설정합니다.
Changing password for user root.
New password:
BAD PASSWORD: The password fails the dictionary check - it is based on a dictionary word
Retype new password:
passwd: all authentication tokens updated successfully.
$ su - root #root 계정으로 전환합니다.
# yum update #yum update를 진행합니다.
# yum install mysql -y #mysql(clinet)를 설치합니다.
# mysql -h35.225.51.XX -uwebadmin -pP@ssw0rd #1장에서 설정한 SQL서버 주소, 계정, 암호를 입력해줍니다.
Database를 생성 & 권한을 설정하고 Test Table을 CREATE & DROP 합니다.
CREATE DATABASE web_db default CHARCTER SET UTF8;
-- DATABASE(SCHEMA) 생성

GRANT ALL PRIVILEGES ON web_db.* TO 'webadmin'@'%'WITH GRANT OPTION;
-- 1장 Google Cloud SQL에서 생성한 계정 정보(webadmin)

USE web_db;
-- web_db로 데이터베이스 사용

CREATE TABLE TEST_DB (
    ID INT(11) NOT NULL,
    NAME CHAR(20),
    ADDRESS CHAR(30)
);
-- Test용 Table 생성

SHOW TABLES;
-- Table 조회

DROP TABLE TEST_DB;
-- Test Table 삭제
Spring Boot 설정
Spring Boot의 Entity를 생성합니다. (해당 게시글에서 Controller, Service 등의 상세 코딩은 제외 하겠습니다)
@Entity
@Data
public class Dashboard {
    @Id
    private Long id;

    private String user;

    private String password;

    private String title;

    private String contents;

    private LocalDateTime writtenTime;
}
Spring Boot의 Repository를 생성합니다.
@Repository
public interface DashboardRepository extends JpaRepository<Dashboard, Long> {}
Application.properties를 설정합니다.
spring.datasource.url=jdbc:mysql://35.225.51.X(Google Cloud SQL 주소):3306/web_db?useSSL=false&characterEncoding=UTF-8&serverTimezone=UTC
spring.datasource.username=webadmin
spring.datasource.password=P@ssw0rd
spring.datasource.driver-class-name=com.mysql.cj.jdbc.Driver
spring.datasource.hikari.connection-test-query=select 1 from dual

spring.jpa.database=mysql
spring.jpa.database-platform=org.hibernate.dialect.MySQL8Dialect
spring.jpa.properties.hibernate.format_sql=true
spring.jpa.hibernate.ddl-auto=update #ddl 자동생성을 위해 update로 설정.
spring.jpa.show-sql=true
spring.jpa.properties.hibernate.enable_lazy_load_no_trans=true
Application을 실행 전 Local PC -> Google Cloud SQL 접속 허용을 안 했기 때문에 허용 IP를 설정해줍니다.
아래 사이트를 통해 자신의 공인 IP를 적어둡니다.
아이피 확인 - my ip address
IP 주소를 확인하는 가장 쉽고 빠른 방법 이 사이트(findip.kr)에 접속하는 것이 IP주소를 확인하는 가장 쉽고 빠른 방법이다. 210.220.74.251 가 현재 접속한 기기의 공인 IP(Internet Protocol) 주소다 IP주소
findip.kr

Google Cloud Platform SQL(연결) 부분을 들어가줍니다.

네트워크 추가를 클릭합니다.

위에서 적어둔 자신의 공인 IP/32를 입력하고 완료 & 저장을 클릭합니다.


그리고 Spring Boot Application을 실행시키면 create문(ddl-auto=update)을 보실 수 있습니다.
이로써, Spring Boot -> MySQL(DataSource) 연결은 성공 했습니다.
Hibernate:

    create table dashboard (
       id bigint not null,
        contents varchar(255),
        password varchar(255),
        title varchar(255),
        user varchar(255),
        written_time datetime(6),
        primary key (id)
    ) engine=InnoDB
2021-09-18 00:56:46.471  INFO 16204 --- [  restartedMain] o.h.e.t.j.p.i.JtaPlatformInitiator       : HHH000490: Using JtaPlatform implementation: [org.hibernate.engine.transaction.jta.platform.internal.NoJtaPlatform]
2021-09-18 00:56:46.480  INFO 16204 --- [  restartedMain] j.LocalContainerEntityManagerFactoryBean : Initialized JPA EntityManagerFactory for persistence unit 'default'
2021-09-18 00:56:46.707  WARN 16204 --- [  restartedMain] JpaBaseConfiguration$JpaWebConfiguration : spring.jpa.open-in-view is enabled by default. Therefore, database queries may be performed during view rendering. Explicitly configure spring.jpa.open-in-view to disable this warning
2021-09-18 00:56:46.873  WARN 16204 --- [  restartedMain] ion$DefaultTemplateResolverConfiguration : Cannot find template location: classpath:/templates/ (please add some templates or check your Thymeleaf configuration)
2021-09-18 00:56:46.938  INFO 16204 --- [  restartedMain] o.s.b.d.a.OptionalLiveReloadServer       : LiveReload server is running on port 35729
2021-09-18 00:56:46.981  INFO 16204 --- [  restartedMain] o.s.b.w.embedded.tomcat.TomcatWebServer  : Tomcat started on port(s): 8080 (http) with context path ''
2021-09-18 00:56:47.002  INFO 16204 --- [  restartedMain] c.study.dashboard.DashboardApplication   : Started DashboardApplication in 5.823 seconds (JVM running for 6.739)
Web project GCP(CentOS7) VM에 배포하기
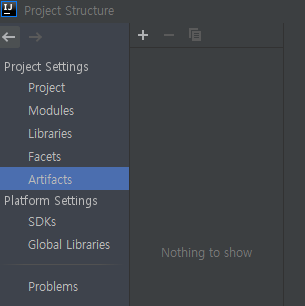
IDE(필자는 Intelli J를 사용함) -> File -> Project Structure를 클릭합니다.

Project Settings(Artifacts) 메뉴를 선택합니다.

'+' 버튼 -> JAR -> From modules with dependencies... 를 통해 JAR Export를 설정합니다.

Main Class 우측 폴더 모양을 클릭해 Main Class를 지정합니다.


프로젝트 관리 도구(Maven, Gradle)를 통해 Package, Compile을 통해 프로젝트를 컴파일링 합니다.

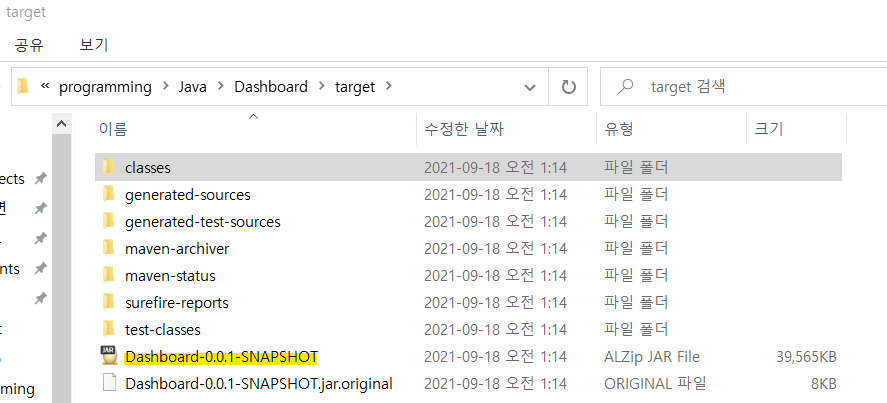
프로젝트 경로로 가면 JAR File이 생성(떨궈져)되어 있습니다. (해당 JAR File을 GCP에서 실행 시켜보도록 하겠습니다)

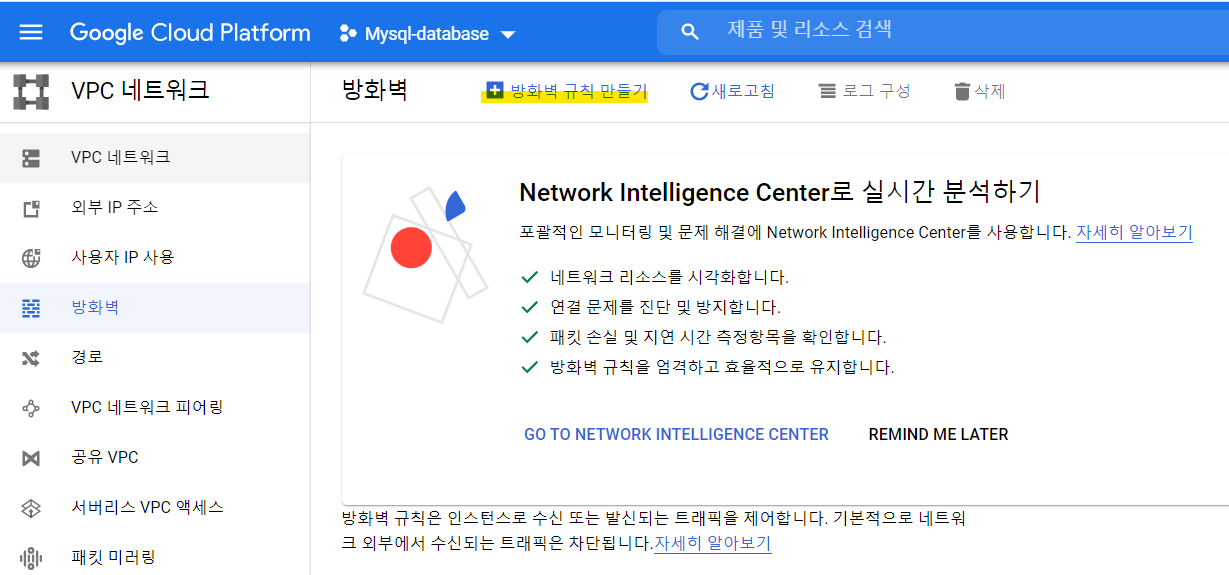
웹 접속을 위해 GCP Console -> VCP 네트워크(방화벽)로 이동합니다.

방화벽 규칙 만들기를 클릭합니다.

방화벽 구성(이름, 대상, 소스 IP, 포트)를 설정 후 방화벽 규칙을 생성합니다.

Compute Engine(VM 인스턴스)로 이동합니다.

SSH를 연결합니다.

Java를 설치 후 경로를 기록합니다. (필자는 자바 16으로 스프링 프로젝트를 구성했기에 Java도 16으로 설치합니다)
또한, 경로를 환경 변수로 지정 할 수 있습니다. (필자는 절대경로로 사용 하겠습니다)
# yum install java-16 -y
# which java
/bin/java
root 계정으로 접속 후 설정(톱니바퀴)을 클릭하여 파일 업로드를 클릭해줍니다.

프로젝트 경로를 들어가 JAR File을 upload 해줍니다.

위에서 나온 위치로 이동(/home/google 계정) 후 java를 통해 jar파일을 실행합니다.
# cd /home/google account
# /bin/java -jar Dashboard-0.0.1-SNAPSHOT.jar
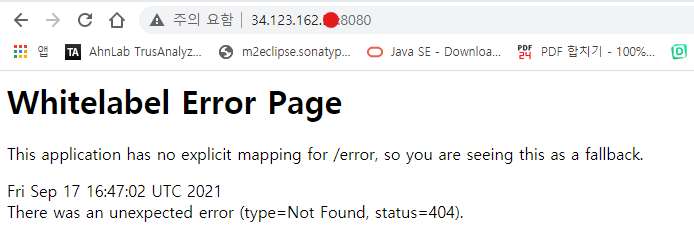
크롬을 통해 GCP 주소:사용 포트를 통해 접속을 확인해줍니다.
(필자는 따로 Controller를 생성 안해줘서 제공되는 웹이 없습니다)

이상 Spring Boot GCP 배포 포스트를 마치겠습니다.
모두 수고 하셨습니다.
'요약 정리' 카테고리의 다른 글
| ChatGPT-4o 란 ? (챗GPT, GPT-4o 등장, 새로운 GPT 버전, 기존 GPT-4와 차이) (1) | 2024.05.15 |
|---|---|
| Windows Kafka 설치 & 서비스 구현 (0) | 2021.12.15 |
| Spring Boot와 Google Cloud SQL연결 및 GCP(Google Cloud Platform) 서버 배포#1 (2) | 2021.09.17 |
| [Java] Array & List Collection 정리 (ArrayList, LinkedList) (1) | 2021.03.01 |
| [Java Spring] @Controller(Spring MVC Controller) 동작 순서 (0) | 2021.02.09 |